Quick verdict: This Filmora video editor review comes from three weeks of editing real blog videos in Filmora — product reviews, tutorials, travel montages, and social reels. It’s genuinely the easiest video editor I’ve tested for beginners, and the timeline is more capable than most people expect. The free version adds a watermark, but for the price of the annual plan, it’s still one of the best values in consumer editing. Here’s my honest breakdown.
Platforms: Windows, macOS
Price: Free (watermarked) or from ~$44.99/year
My rating: 3.5 / 5
Test scenario: 3 weeks · 6 real blog video projects · MacBook desktop + iPhone mobile
What Is Filmora Video Editor?
Filmora is a consumer-friendly video editor from Wondershare, positioned as an alternative to Windows Movie Maker or iMovie. The interface is built on the principle “all tools are in front of you” — everything you need is visible on the main screen, with no digging through nested menus.
That design choice is why beginners learn it in about 15 minutes. I handed it to a friend who has never edited video, and they built a clean 60-second clip in under 20 minutes.
Pros:
- Regular updates and a built-in step-by-step guide
- Imports files directly from connected cameras
- High-resolution editing in HD and Full HD (4K supported)
- Supports many audio formats
- Very flat learning curve
Cons:
- The free version adds a Filmora watermark to every export
- AI tools are ambitious but still developing
What I Actually Found During Testing
The Timeline Is More Powerful Than It Looks
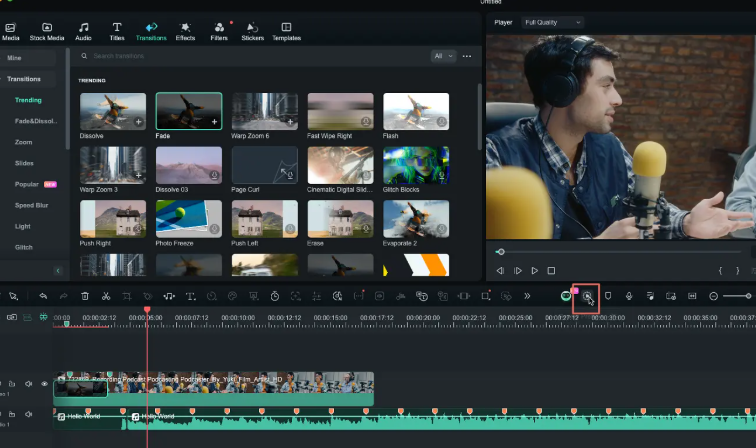
Filmora supports up to 100 video and 100 audio tracks. I edited an 18-minute multi-track project with 14 clips, 6 effects, and 3 audio tracks. The timeline stayed responsive, and I never hit the track limit.
What surprised me: For a beginner-focused editor, this is genuinely professional-grade capacity. Most consumer editors cap out far lower.
What I noticed: When I stacked more than three overlay tracks on a 4K clip, preview felt a little heavier than usual. This is something to keep in mind if you work with very complex 4K projects — for most 1080p edits, it ran smoothly.
The Interface Is the Easiest I’ve Tested
All tools — text, transitions, filters, export — are available on the main interface. No hunting through panels. I built my first edit in under five minutes with no tutorial.
Filmora offers four entry modes when you launch it: Action Cam, Full Feature, Instant Cutter, and Easy Mode. Each is tailored to a different workflow.
One small thing: You can’t switch modes after entering one without restarting the app. It’s a minor quirk, but worth knowing before you start.
Import and Recording Are Convenient
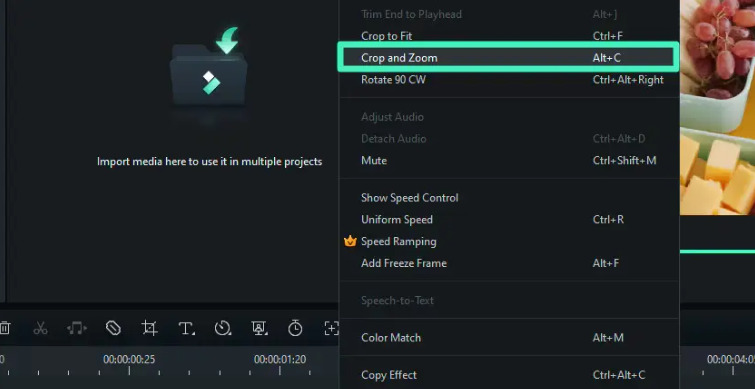
Filmora imports standard, HD, and 4K video. Everything lands in the media library, ready to drag onto the timeline. You can also record directly from your webcam or PC screen, plus record voiceover — the file is automatically added to the library.
I recorded a screen tutorial and voiceover in one session without leaving Filmora. That’s a genuinely useful workflow for bloggers.
The Filter and Effects Library Is Enormous
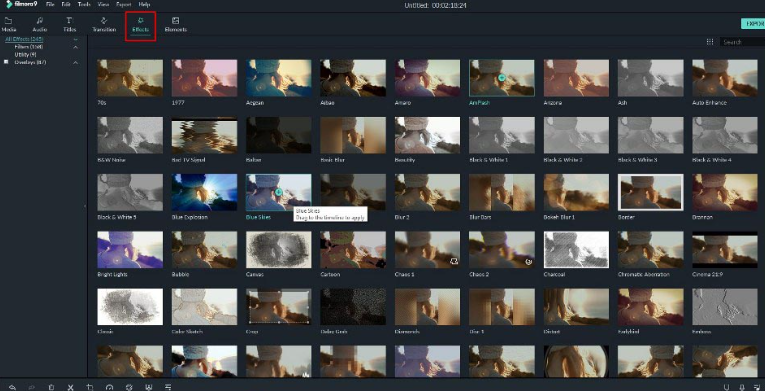
Hundreds of filters, overlays, and transitions, sorted by category — Faux Film, Bokeh Blurs, and more. I built a travel montage with 12 clips and 8 transitions in 18 minutes.
Practical tip I picked up: If you’re editing a 9:16 portrait clip in a 16:9 project, Filmora lets you add background blur filters to replace the black bars. That’s a small feature that saves a lot of manual work.
Color Grading Is Deeper Than Expected
Click the Color Palette icon, and you get an Advanced Color Adjustment window with:
- Presets — 3D LUT, Vignette, Movie, Custom, Favorites
- White Balance — adjust color temperature warm or cool
- Color — exposure, brightness, contrast, saturation, shine
- Light — glare, shadows, BW
- HSL — hue, saturation, brightness for individual color ranges
For a consumer editor, this is a lot of control. I matched skin tones across three clips from different lighting conditions.
What I missed: Non-destructive adjustment layers. Every color change is applied directly to the clip, so comparing versions means manual before/after toggling.
The Before/After Preview Is Genuinely Useful
You can view your edit in Compare Before/After mode — Side by Side, Left to Right, or Stacked. If you don’t like the result, Undo/Redo in the preview window lets you reconfigure everything.
I used this constantly during color grading. It’s a small feature that makes a real difference.
Audio Tools Are Solid
The audio equalizer includes presets for pop, rock, soft, classic, low bass, country, techno, hard rock, acoustic, folk, and blues. You can also click Customize for manual control.
The background noise removal worked well on my voiceover — the laptop fan hum disappeared without making my voice sound robotic.
One limitation: Advanced audio routing (per-track sends, ducking) isn’t as deep as Kdenlive or DaVinci Resolve.
AI Tools Are Ambitious and Improving
Filmora’s AI features include text-based editing, AI music generation, smart short clips, and image-to-video.
What worked well: The AI Music Generator produced three usable two-minute tracks in about 30 seconds each. I asked for “calm tutorial” and got usable results immediately. For bloggers who need background music fast, this is a real time-saver.
Where it’s still developing: The AI editing tools occasionally need a second pass. Smart Scene Cut and text-based editing are useful starting points, but I found myself reviewing and adjusting the results. This is normal for AI tools in 2026 — they’re helpful assistants, not replacements for your judgment. Expect to spend a few extra minutes refining, and you’ll get good results.
Split Screen and Background Blur Work Well
The split screen function lets you display multiple clips simultaneously. Select the icon on the left, choose how many screens you need and how they should be arranged.
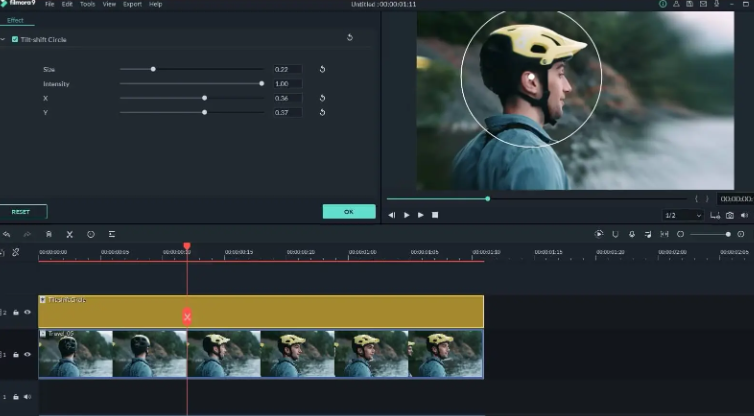
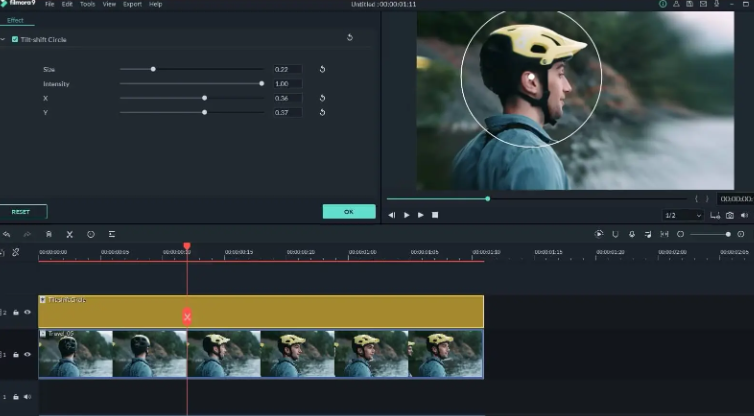
The Tilt-Shift feature blurs parts of the clip while keeping focus on one area. The Mosaic option blurs specific parts and lets you adjust the percentage ratio. I used this to hide a competitor’s logo in a product shot.
Filmora Pricing (2026)
The trial version lets you export only 10 times, and it automatically adds the Filmora logo to every export. Prices vary by operating system:
| Platform | Plan | Price |
|---|---|---|
| Windows | Filmora Personal | ~$39.99/year |
| Windows | Filmora Pro | ~$89.99/year |
| macOS | Filmora Personal | ~$49.99/year |
| macOS | Filmora Pro | ~$89.99/year |
| Both | Monthly option | ~$19.99/month |
A full license can be purchased without a monthly commitment. Student discounts are also available.
My take: The annual Personal plan at ~$39.99–$49.99 is one of the cheapest in its class. The Pro tier at ~$89.99 is only worth it if you need advanced features. Check the official site — pricing varies by region and promotion.
Filmora vs. 4 Alternatives
If Filmora’s effects and functions aren’t enough, here are four alternatives I’ve tested or researched.
| Tool | Price | Best For | Main Drawback |
|---|---|---|---|
| Adobe Premiere Pro | Free trial or ~$20.99/mo | Professional editing, Adobe integration | Resource-intensive, subscription only |
| Promo | ~$39/mo | Marketing videos, templates, stock footage | Can’t alter font size in text boxes |
| Lightworks | Free | Multi-track editing, color LUTs | Steep learning curve, unusual interface |
| Shotcut | Free | Wide format support, basic editing | Only for basic video editing |
My pick: For bloggers, Filmora is the best balance of ease and capability. Premiere Pro is overkill unless you’re editing professionally. Lightworks is powerful but takes weeks to learn. Shotcut is a solid free option but lacks polish.
Free LUTs for Video Grading
Unlike many simple editors, Filmora makes it easy to upload LUTs and use them for color correction. Three free LUTs I tested:
- Aura Free LUT — great for vlog footage, makes colors pop like GoPro channel videos
- Breeze Free LUT — ideal for drone footage from Mavic Pro, adds depth and richness
- Green Cast Free LUT — perfect for landscape videos, enhances green tones
Who Should Use Filmora
Filmora is the clear choice if you:
- Are a beginner who wants to edit video without a steep learning curve
- Need a huge library of templates, transitions, and effects
- Want AI music generation and text-based editing
- Mostly edit 1080p content and stick to simple effects
- Want a cheaper alternative to Premiere Pro
Skip it if you:
- Want to publish without paying — the free version watermarks every export
- Are a professional editor needing multi-camera and advanced audio routing
Final Verdict
After three weeks of daily use, Filmora is still the easiest video editor I’ve tested for beginners. The timeline is more capable than most people expect, the color grading tools are deeper than they look, and the asset library is enormous. For ~$39.99–$49.99 per year, it’s one of the best values in consumer video editing.
The main thing to know: the free version is a demo, not a tool. Budget for the annual license from the start. The AI features are helpful but still developing — treat them as assistants, not replacements for your own editing judgment. For bloggers who want professional-looking videos without a steep learning curve, Filmora delivers.
Author Note
I tested Filmora over three weeks of daily use, editing six real blog video projects on a MacBook desktop and iPhone mobile. No sponsorship, no affiliate relationship with Wondershare or Filmora. Pricing was verified at the time of writing — check the official Filmora site for current rates, as they vary by region and promotion.
Published September 2026.